Return to index page
Previous image Next image
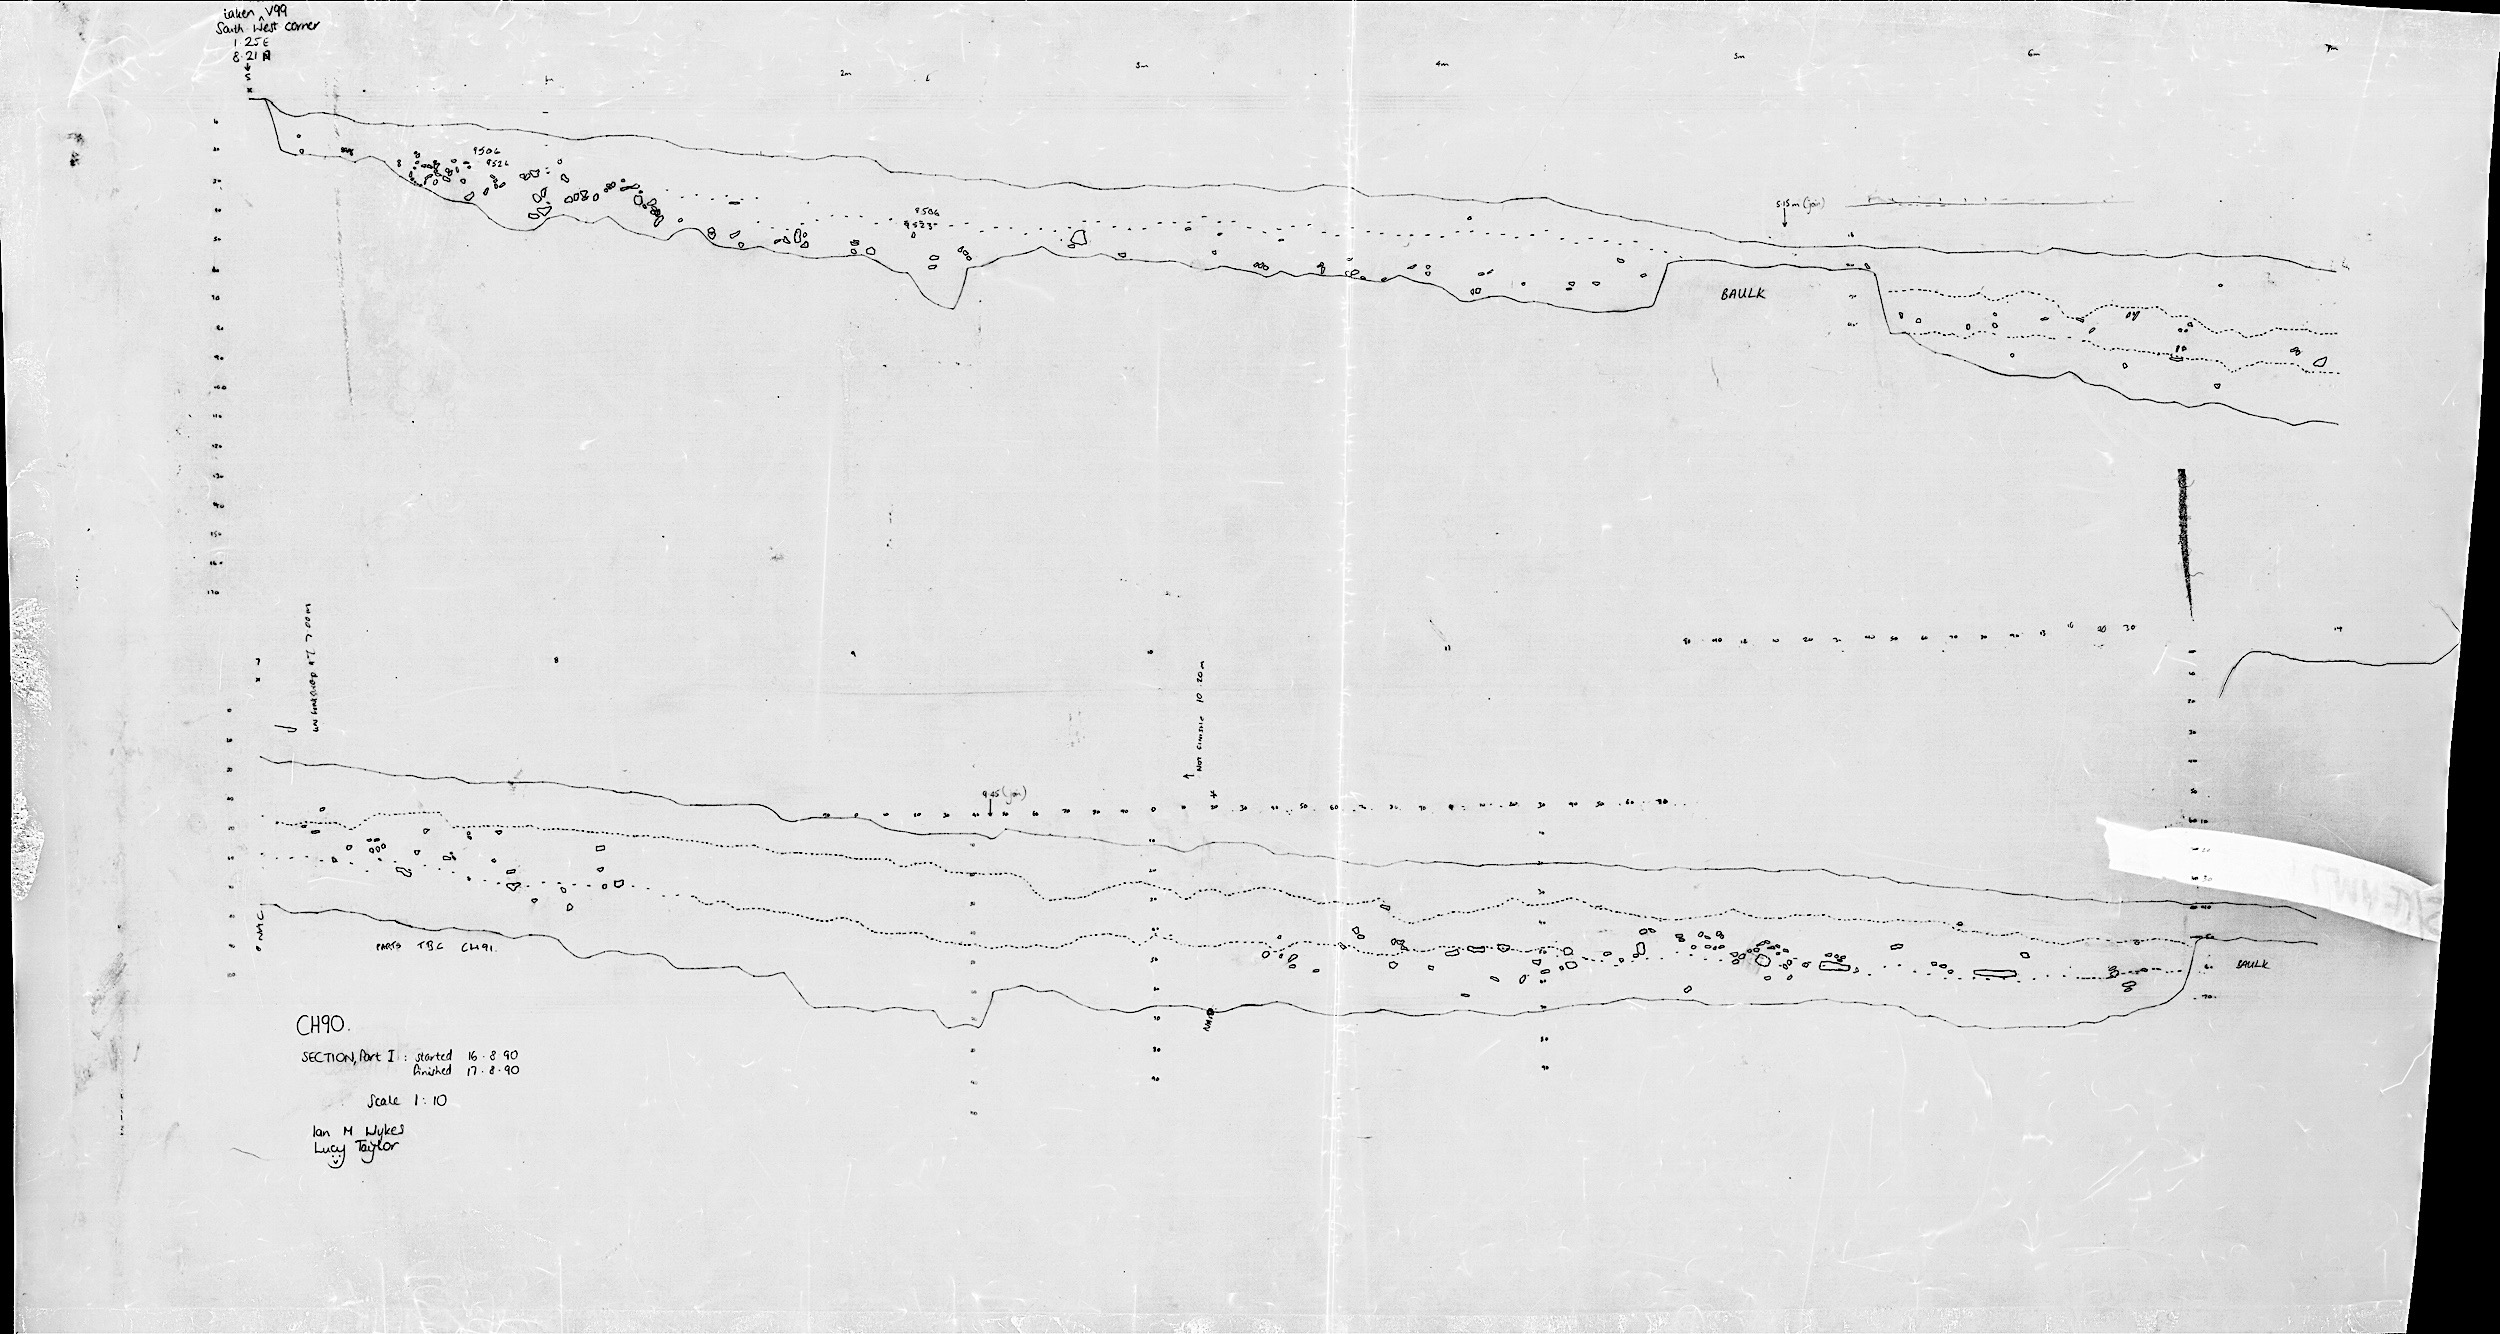
4. Long Mound section